Configure Port trunking for QNAP NAS in a Cisco switch
We recently bought a QNAP mode TVS-672XT which so far has been working wonderfully well, and I wanted to further expand its brilliant capabilities by enabling port trunking into a Cisco switch that we have. This is how I did it
- Initial configuration in the QNAP
- Port-Channel configuration in the Cisco switch for the QNAP
- Switch port configuration for the QNAP
- Start the Port Trunking configuration wizard in the QNAP
1) Initial configuration in the QNAP
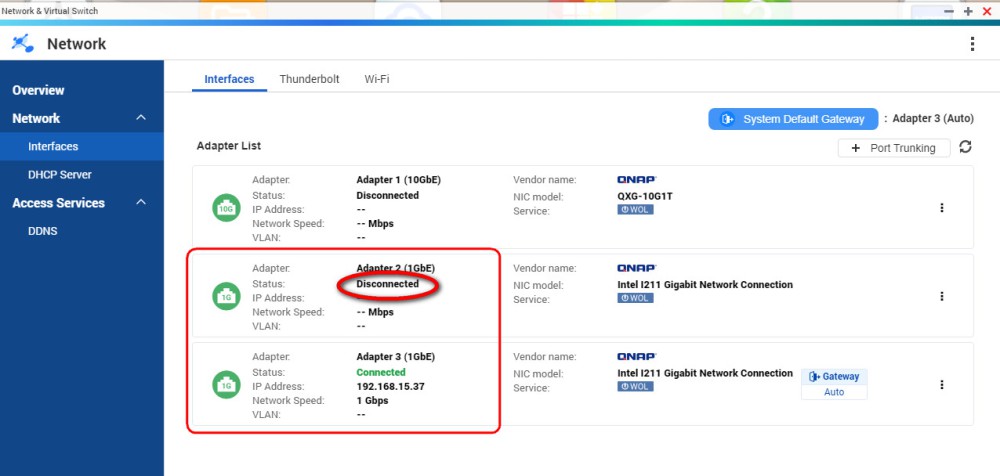
Start by having a network interface configured with a static IP address (on my example below I used 192.168.15.37) and leave the other adapter disconnected and on DHCP. Notice that this QNAP comes with a 10GbE adapter that obviously we can't use in the port trunking configuration because is of a different speed than of the two 1Gpbs that we are trying to trunk
2) Port-Channel configuration in the Cisco switch for the QNAP
On your Cisco switch, go to Global Configuration mode - (config)# - and enter these commands. This will create a port channel (on my example number 6) and assigned to a vlan (on my example vlan number 33), ready to be connected to the two physical ports where we are going to connect the QNAP
interface po 6
description to_QNAP_Videos_Trunk
switchport access vlan 33
switchport mode access
3) Switch port configuration for the QNAP
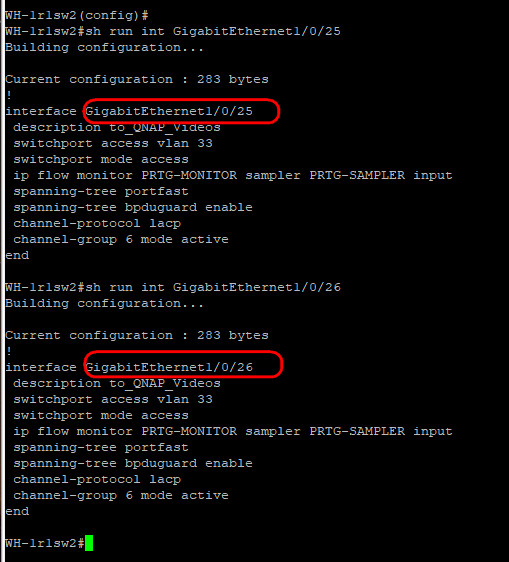
Still on your Cisco switch, select the two ports where you're are planning to connect the QNAP on trunk mode, for my example I used ports 25 and 26
description to_QNAP_Videos
switchport access vlan 33
switchport mode access
ip flow monitor PRTG-MONITOR sampler PRTG-SAMPLER input
spanning-tree portfast
spanning-tree bpduguard enable
channel-protocol lacp
channel-group 6 mode active
The line for IP Flow Monitor is only applicable is your have configured NetFlow for that switch as documented in this my other article for PRTG: https://www.nazaudy.com/index.php/cisco/34-enable-netflow-v9-in-cisco-switches-with-prtg
4) Start the Port Trunking configuration wizard in the QNAP
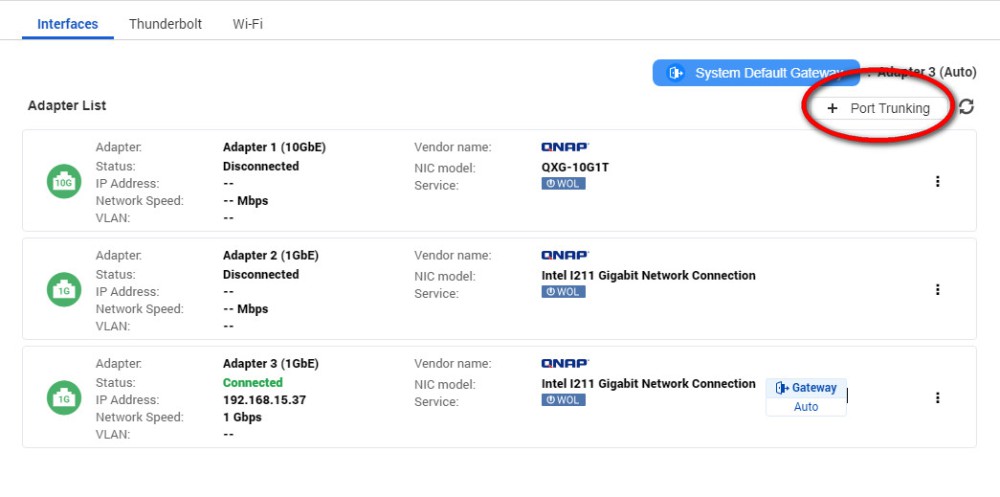
Once the Cisco switch is fully configure, and before you connect the QNAP to those configured trunked ports, visit the QNAP and start the "Port Trunking" configuration wizard
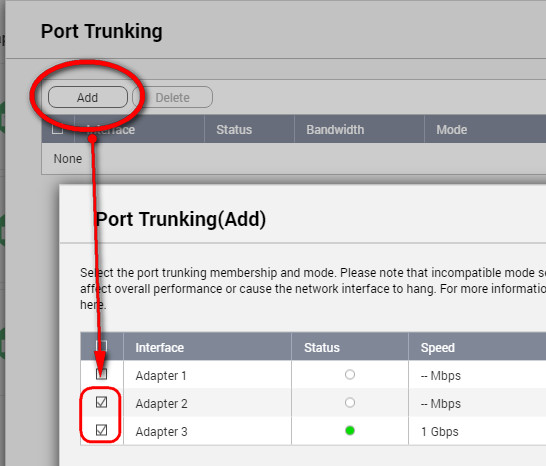
Once the wizard starts, click on "Add" and select the two ports that run at 1Gbps in your QNAP box, then click Next to continue with the wizard
Ignore the warning messages that says: "They are in different network domains. The original client might be disconnected, and related services such as DHCP server will be interrupted. Please remember to re-configure your network afterwards", and click on Next.
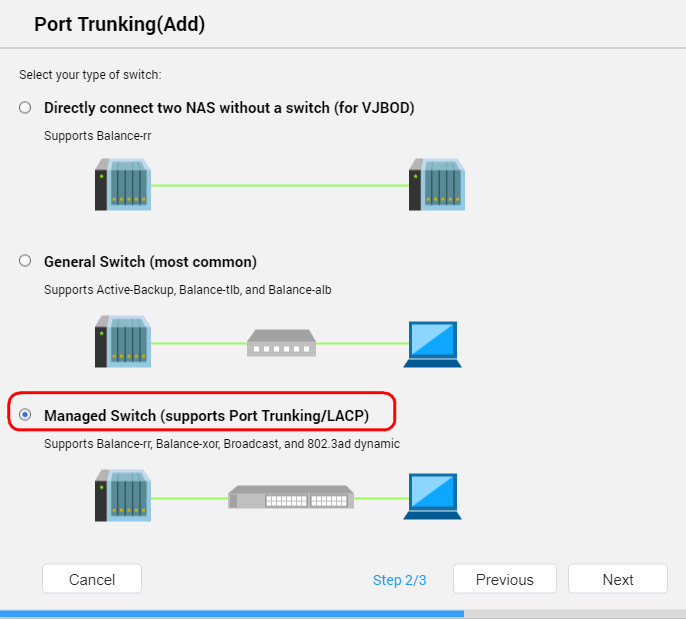
On the next window, please select "Managed Switch (support Port Trunking/LACP), and click on Next
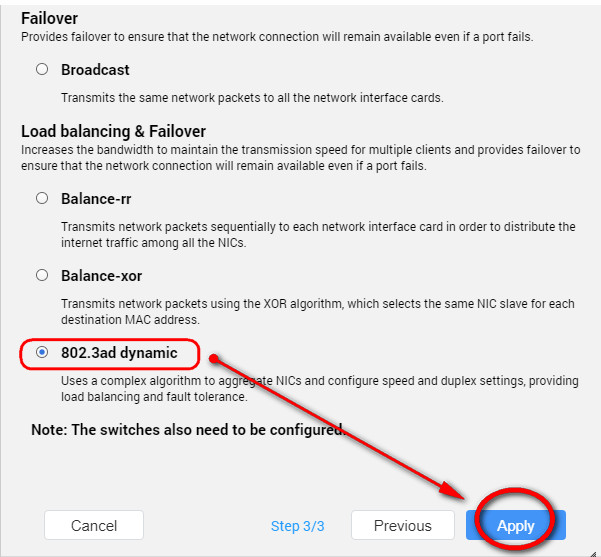
Use the default option "802.3ad dynamic" for the Load Balancing and Failover, then click on Apply
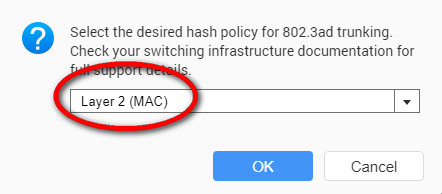
For the next window select "Layer 2 (MAC)" for the hash policy, as this will required no configuration in your Cisco switch
After you reboot, the QNAP will bound those two ports together but.... under DHCP! So have a look at the digital display in front of the unit and
Now connect the 2 network ports of the QNAP into the designated (and already configured) ports in your Cisco switch
Comments powered by CComment