Configure ESXi host for multi vlans on a cisco switch
This article explains you how to configure ESXi host for multi vlans on a cisco switch so that you distribute the network traffic evenly
Let's go wild and imagine you have an ESXi host with 6 network cards, and you want to use 4 or even more different VLANS to pass traffic through the internal VMS on the host, how would you do that? In this article I explain how I've done it
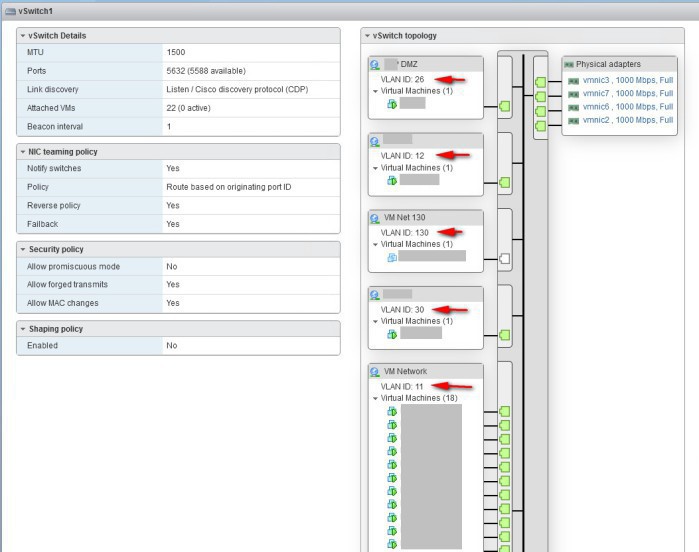
First of all, a visual layout of the final goal of this article, where you can see different Virtual Groups, all within the same Virtual Switch (vSwithc1) and ALL connected to the same 4 x vmnics:
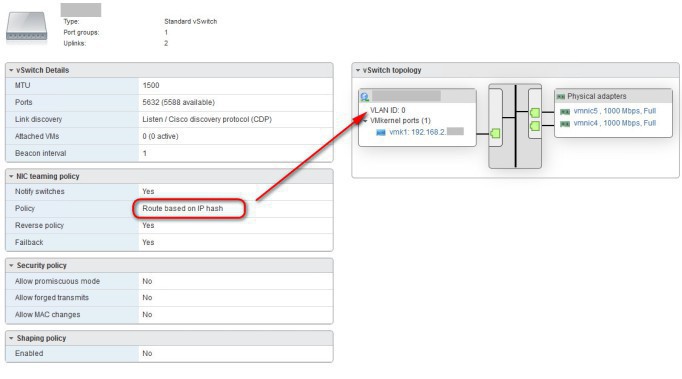
Note that apart from the config of the above 4 vmnic, this hosts also have 2 x extra vmnics that are use purely for storage, and that are configured without multi-vlans, and rather for load balancing, as explained on this my other article: https://www.nazaudy.com/index.php/11-technology/vmware/41-esxi-trunk-to-cisco-c2960-switch-how-to-load-balance-traffic
Now that this is all clear, let's start with the multi-vlan configuration for this host:
- Enter Maintenance Mode
- Create Virtual Switch
- Create Management Port Group
- Create the VMkernel
- Configure the Cisco switch
- Reboot the host
Before making any configuration to any of your ESXi hosts, always put them on Maintenance Mode, so please follow VMware Guidelines and execute it:
We are going to be doing this configuration on the host itself, so even if you have it attached to a vCenter server, do visit the IP of the host itself as it would be easier to configure it that way
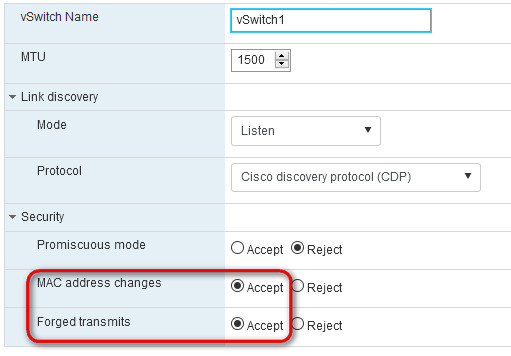
Once you have it on Maintenance mode, create a new standard virtual switch called "vSwitch1" with the following settings:
After the creation, visit the switch to ensure it has the Nic Teaming Policy = "Route based on originating port ID", which is the default
Do not add any uplink nics to that switch just yet
3 Create Management Port Group
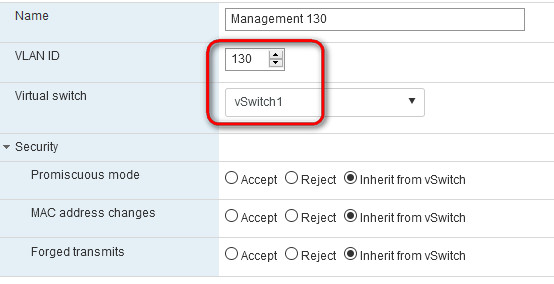
Visit the "Networking" section of the host and create a new Port Group calling it "Management xx" where xx is the VLAN ID of the management VLAN which on my example is VLAN 130. Associate that new port group to the previously created virtual switch
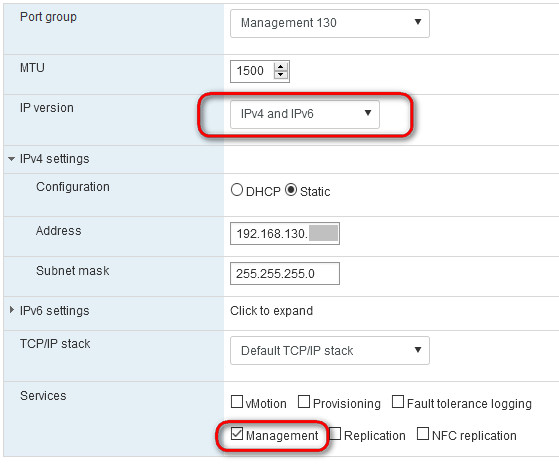
You probably have on the host a VMkernel for Traffic Management. In any case, modify or create a new vVMernel and set it with an IP within the range of your management vlan, which on my case is again vlan 130
Now visit your Cisco switch and configure the ports where the host will connect with these settings:
description Host_2_ALL_VLANs
switchport trunk allowed vlan 11,12,26,30,130
switchport mode trunk
spanning-tree portfast trunk
Notice that I've allowed the VLANs that we use on our network, all the way from vlan 11 to vlan 130. Obviously, you just need to add the VLANs that you have on your own network
Finally, time to battle with the console of the host. Set the management vlan to 130, connect at least one port (that has the above configuration of the switch, allowing traffic through vlan 130), and associated to the management console. I had the reboot the host and play with it for a bit, restarting the Management Network a few times until it finally detected the new configuration
Best of luck if your try this procedure! It is definitely handy to have the host "see" so many vlans with just a handful of physical nics
London, 28 January 2021
References
- https://kb.vmware.com/s/article/1003806
- https://kb.vmware.com/s/article/1004074
- https://kb.vmware.com/s/article/1003825


Comments powered by CComment