Install onCommand Unified Manager 9.5 P1 for NetApp and qtree configuration
In this guide I documented the Install onCommand Unified Manager 9.5 P1 for NetApp and qtree configuration for a NetApp model FS2552 running ONTAP Release 9.6 P5.. uf! Glad I took all that our of my chest :) Once UM is installed, I documented what needed to be configured for users of NetApp to received a notification when their exceed their quota... yep, they'll need to deleted all those lovely pictures & videos of their vacations, weddings, pets, etc that they have on their personal areas. This article is basically a continuation of my other article regarding the NetApp Simulator 9.6: https://www.nazaudy.com/index.php/11-technology/vmware/85-netapp-simulator-9-6-installation-and-configuration
As you probably know by now, onCommand Unified Manager is a notification extension to your NetApp, that sends you mail whenever a threshold or alert is met
Let's start as usual with the bullets points of what you'll find in this article, and then dive into business:
- Download onCommand Unified Manager
- Deploy onCommand template to vSphere
- Logon to onCommand UM for the first time
- Configure the Quota mail for users - once only
- Configure email addresses rules - only once per user
And finally, follows these steps whenever you create a new user on your network:
- Create a personal user area
- Create user quota in ONTAP System Manager
- Add the user address rule into the Quota Mail
1. Download onCommand Unified Manager
Our NetApp FS2552 came already with "ONTAP System Manager" web interface configured. For t he onCommand UM installation, go ahead ad visit this link to download (needless to say, you'll need to logon with your NetApp account) https://mysupport.netapp.com/
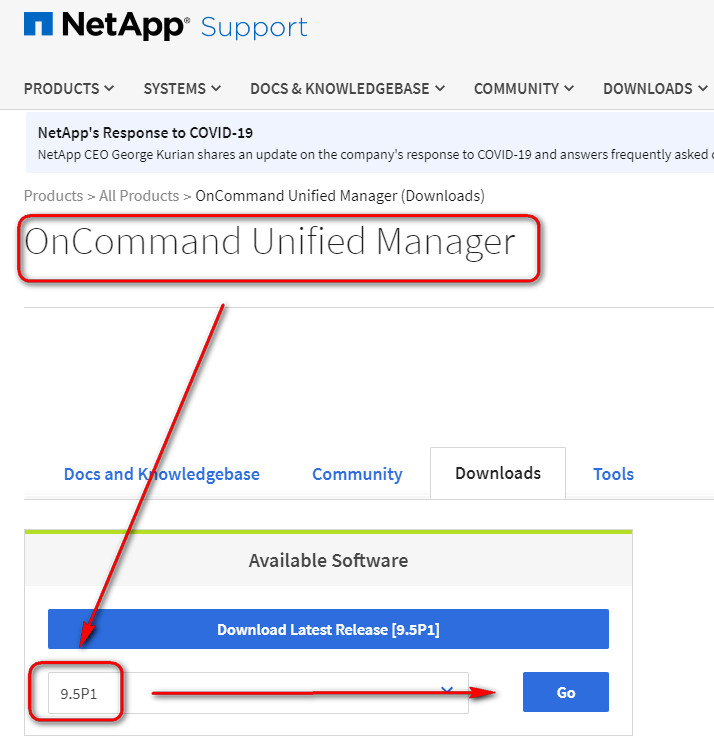
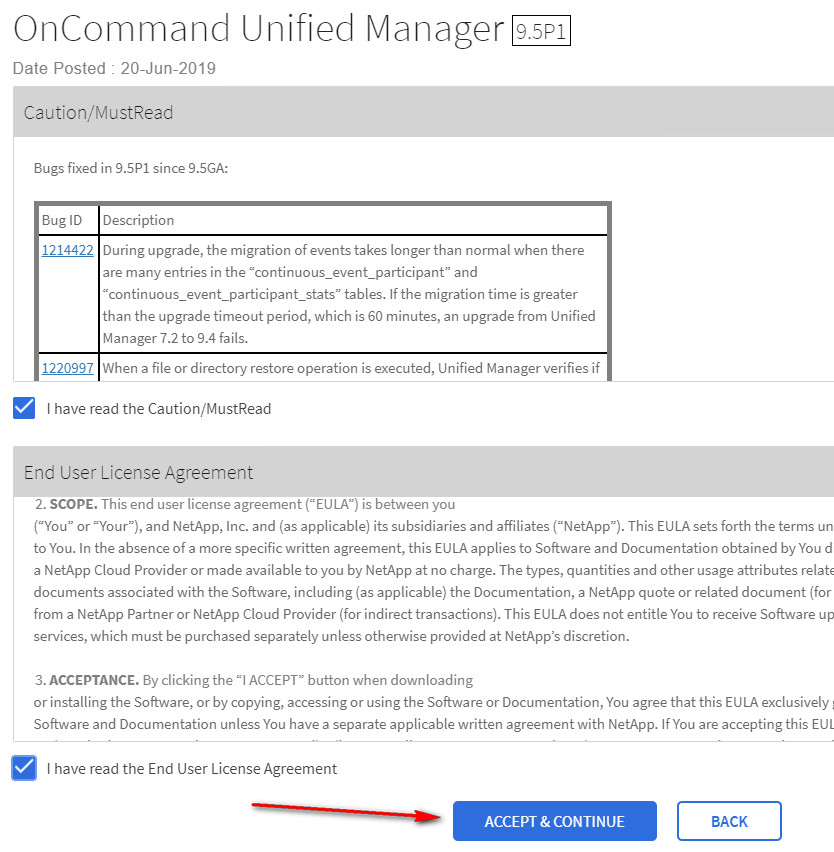
For the next windows, agree to all Patches updates and License, and click "Accept & Continue"
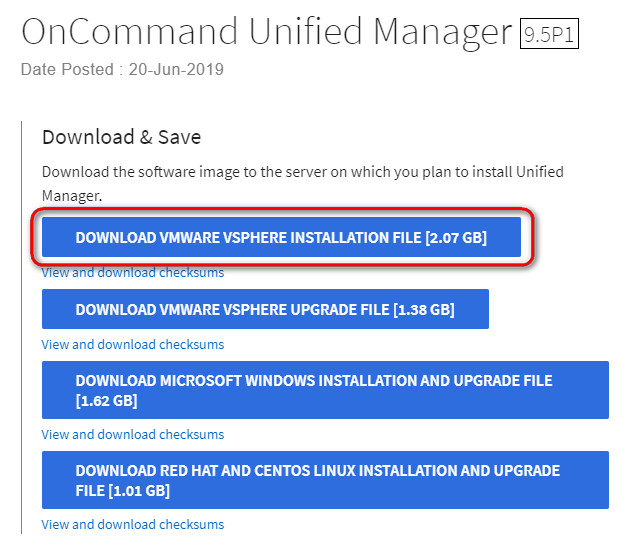
I choose to download the .ova file, the VMware installation, but suit yourself and download whichever flavour best fit on your environment
2. Deploy onCommand template to vSphere
I bet you have done this a gazillion times, but one more time please, visit your vSphere environment and import the just downloaded .ova file
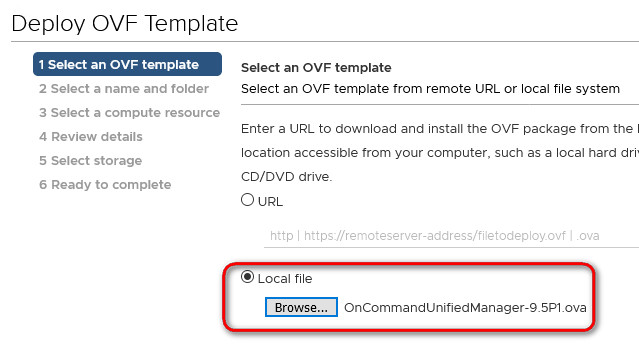
For the next options, I chose as follows:
- Virtual Machine Name: NetApp1OnCommandUM
- Pick any available host in your cluster: 12GB of RAM, 4CPU and 60GB storage (thin) are needed
- Accept the license agreement: yes
- Pick up storage location: thin storage
- Network: VMNetwork
- Unless DHCP is not in used, then enter the Network Configuration details
Once you enter all details correctly, click to Import and you'll see the installation progress in the toolbar

After successful installation on the template in the vSphere vCenter environment, edit the setting of the VM and ensure that "Other Linux 64-bit" is configured as the Guest Operating System
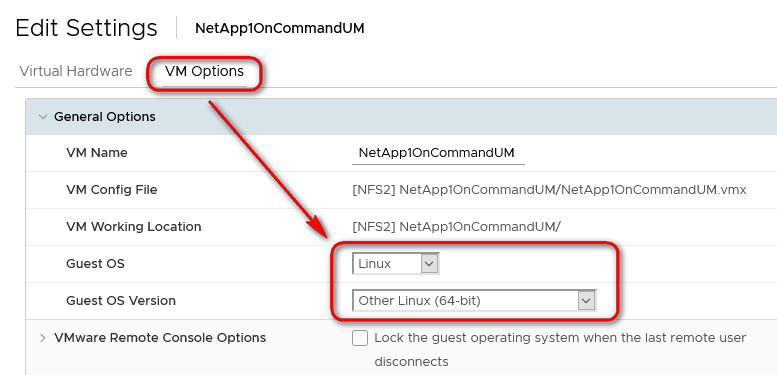
Ensure that the CD-ROM is set to local Client, then turn on the VM and wait for the initialisation process to complete... and if you get the VM stuck on a window like this....
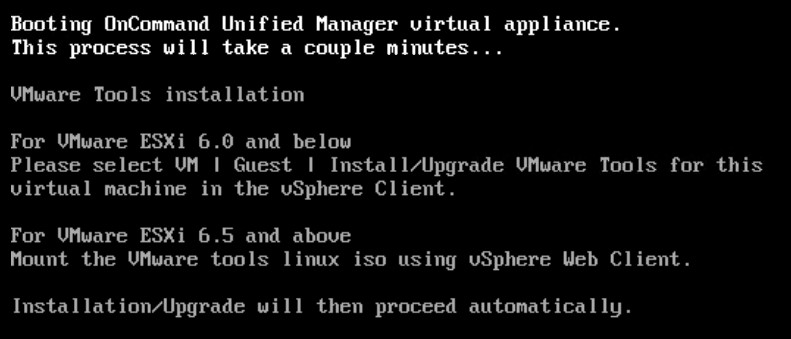
Ensure you have inserted the VMware Tools CD room

Enter the timezone and the additional IP addressing setting
3. Logon to onCommand UM for the first time
Upon logon with your credentials to the web interface of the appliance, you'll be asked to enter the SMTP details for mail delivery, these were mine:

Click on "add cluster" and enter the details of your cluster, on my example the IP of the cluster is 192.168.70.221

If you get this dreadful error message: "Authorize Cluster Certificate. Host 192.x.x.x you specified has identified itself with a self signed certificate for OnCommand Unified Managerthat has expired. Therefore, you cannot proceed". Then, that's a whole different issue: you need to renew your NetApp certificate. Try to add the cluster using HTTP 80 and it will work

4. Configure the Quota mail for users - once only
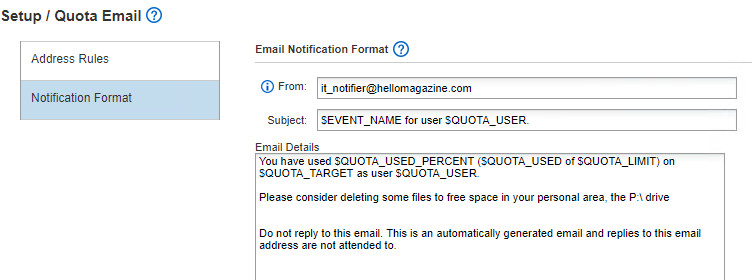
Still on the setup options, visit Quota Mail >> Notification Format and enter in there what you'd like the users to received when they exceed their quota limit. For the record, the message I configure was:
- Subject: $EVENT_NAME for user $QUOTA_USER.
- Email details:
You have used $QUOTA_USED_PERCENT ($QUOTA_USED of $QUOTA_LIMIT) on $QUOTA_TARGET as user $QUOTA_USER.
Please consider deleting some files to free space in your personal area, the P:\ drive
Do not reply to this email. This is an automatically generated email and replies to this email address are not attended to.
5. Configure email address rules - only once per user
Unless you have MS Exchange, most likely the email address domain of your internal network is different front the actual email address domain of your company, for example, I normally tend to use "nazaudy.internal" as my internal domain, while my external domain is "nazaudy.com". To modify this and successfully send mail to your users, you will to create a rule for each one of your users, where the grab their user names and tell onCommnad Unified Manager which email address address you want to use to communicate with that user. The format for that rule is this:
if ($USER_OR_GROUP=='adusername') then whicheveryournameformat @whicheveryourdomain.com
if ($USER_OR_GROUP=='nazaudy') then
_______________
And finally, follows these steps whenever you create a new user on your network:
I documented this on my other article "Windows 10 - Management tips", please have a look here, each user needs to have a independently configured area: https://www.nazaudy.com/index.php/13-technology/microsoft/32-windows-10-management-tips#Z5
Once you create the user, visit your NetApp System Manager >> Storage >> Qoutas and click on "Create" to start the New Quota Wizard. Select the "Home_Qtree" that you previously created, and choose 'User' as the quota type
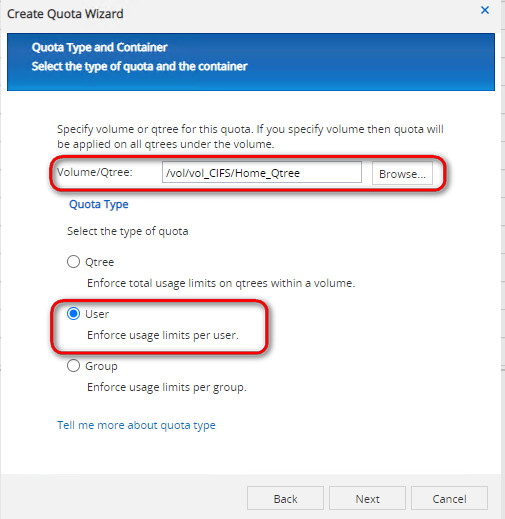
Enter the your domain name + username for the specific user, on my example is NAZAUDY\username
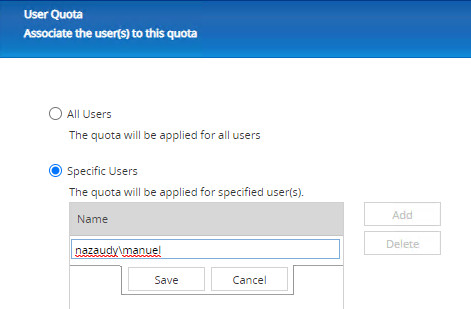
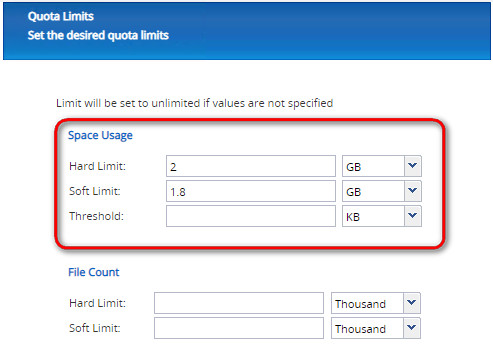
Set the Hard and Soft limits as per your liking. I normally choose by default 2GB with 200MB of buffer for warning
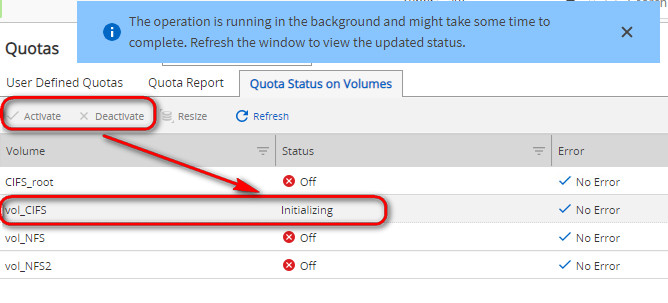
And finally for this bullet point, the most annoying task of them all, is that you need to visit the "Quota Status on Volumes" tab and Deactivate the quotas on the "vol_CIFS" volume, and then activated again so that the NetApp recognises that last account that you've just added. Shame it doesn't do it automagically. The process of "Initialising" took about 30' on the 7TB storage I have
Visit setup >> Quota Mail >> Address Rule and add a new rule for that user, so that onCommand Unified Manager can send mail correctly
if ($USER_OR_GROUP=='') then
And that's it, you can now visit onCommand Unified Manager >> Health >> SVMs >> User and Group Quotas tab, and see your list of users
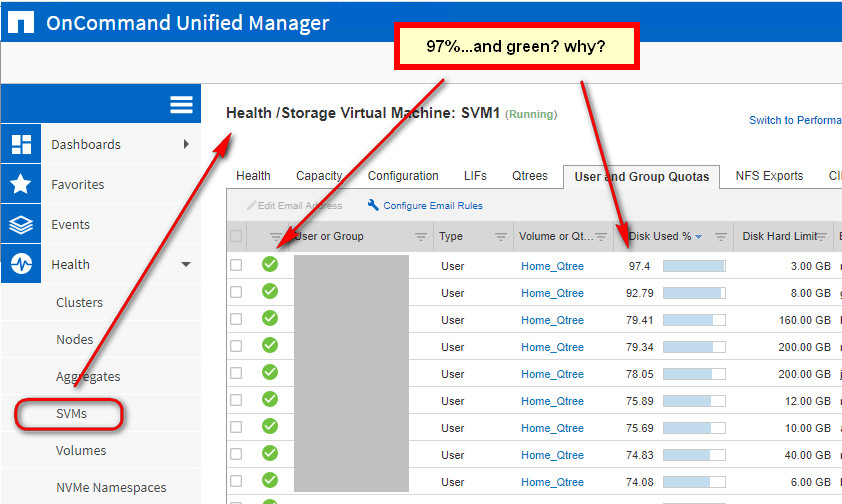
Yep, I had no idea how come that has used 97% of his quota is not marked with error. If anyone knows a solution to his I'll gladly post it up here
Thank you and good luck!
Troubleshooting
If you get this error: "Failed to send email. Check that the SMTP server is configured correctly and refer to the SMTP server logs for details. Additional details: Could not connect to SMTP host: smtp.gmail.com port: 587" at the time of sending an email, and you have triple checked the SMTP settings under dented wheel >> Setup >> Notifications, then please ensure you have setup the SSL port correctly, it needs to be 465

References
- Configuring Unified Manager https://docs.netapp.com/ocum-95/index.jsp?topic=%2Fcom.netapp.doc.onc-um-sysconfig%2FGUID-B85C8880-3402-4032-8855-CE88F4588362.html